В переработке нефти и газа, эффективное удаление воды из сырой нефти имеет решающее значение для соответствия техническим требованиям трубопровода., уменьшить коррозию, и оптимизировать последующие операции. На рынке доминируют две основные технологии: электростатический коагулятор и обычный дегидратор. Оба стремятся отделить воду от нефти., их механизмы, эффективность, и эксплуатационные расходы существенно различаются. В этой статье представлено сравнение на основе данных, которое поможет вам определить, какое решение соответствует вашим требованиям к обработке., опираясь на отраслевой опыт Zhengyuan Petrochemical, надежный поставщик сепарационного оборудования.
Понимание основ: Как работает каждая технология
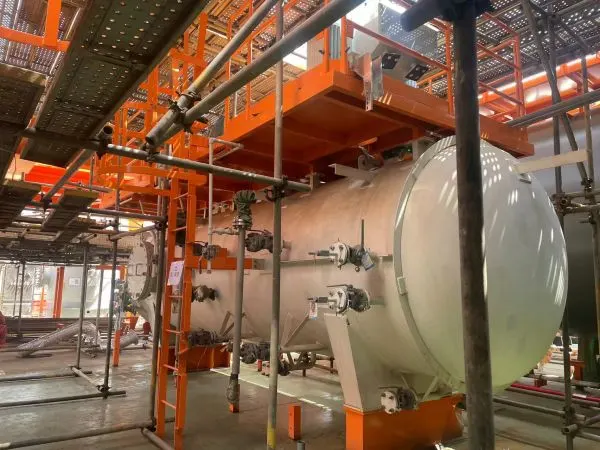
Технология электростатического коагулятора
Электростатические коагуляторы используют электрическое поле высокого напряжения для поляризации капель воды, взвешенных в масляной фазе.. Индуцированные диполи заставляют капли притягиваться и сливаться., образуя более крупные капли, которые быстро оседают под действием силы тяжести. Современные агрегаты, например, разработанные Zhengyuan Petrochemical, объединить электрические поля с оптимизированным распределением потока и внутренними перегородками для достижения скорости удаления воды, превышающей 99% для средней и тяжелой нефти. Ключевые компоненты включают изолированные электроды., системы управления электропитанием, и коалесцирующие среды, которые усиливают рост капель, не вызывая эмульгирования..
Традиционная технология дегидратора
Обычные дегидраторы полагаются в первую очередь на гравитационное осаждение., часто помогают химические деэмульгаторы, нагревать, и механические внутренние детали, такие как водосливы и пластины. Эти системы работают с меньшими затратами энергии, но требуют более длительного времени пребывания и большего объема резервуаров для достижения сопоставимой обводненности.. Они проверены в стабильной, приложения с легкой нефтью, но с трудом справляются с плотными эмульсиями или потоками сырья с высоким содержанием воды. Типичные традиционные установки обеспечивают удаление воды на 90–95 %., с дальнейшими этапами часто необходимы.
Сравнение эффективности: Ключевые показатели, которые имеют значение
Чтобы объективно оценить эффективность, мы сравниваем две технологии по четырем критическим измерениям:
- Скорость обезвоживания: Электростатические коагуляторы стабильно достигают 99%+ однопроходное обезвоживание нефти с содержанием воды до 30% содержание воды, в то время как обычные дегидраторы часто требуют двух или более ступеней для достижения аналогичных уровней..
- Энергопотребление: Электростатические агрегаты потребляют 0,5–2 кВтч на баррель., в зависимости от вязкости сырой нефти и размера капель воды. Обычные системы с впрыском тепла и химикатов могут потреблять 3–5 кВтч на баррель с учетом дополнительной перекачки и обогрева..
- След & Масса: Поскольку электростатические коагуляторы работают с более коротким временем пребывания (3–10 минут против. 20–60 минут для обычных судов), для них требуются значительно меньшие суда — до 50% уменьшение габаритов при одинаковой производительности.
…
Для получения более подробной информации об электростатических коалесцерах и традиционных дегидраторах: борьба за эффективность, пожалуйста, нажмите здесь: https://www.zy-petrochemical.com/a/news/coalescer-vs-dehydrator.html